
Which layers should the perforation cut?
Write the intended cut depth on the drawing. A perforation through a detachable label section and a perforation that separates sections of backing are different operations. A conventional kiss-cut label outline is different again: it normally cuts the face and adhesive while leaving the release liner continuous.
The drawing should distinguish the outside contour from the perforation and identify the layer or layers involved. Laminaform's perforated-label die guidance makes this distinction explicit. A dashed line without a layer note leaves room for the wrong interpretation.
| Intended function | Define on the drawing | Check on the finished sample |
|---|---|---|
| A detachable section within a label | The retained section, detachable section and intended cut depth | The tear follows the intended path without damaging the part that stays behind |
| Separation between labels or sections of a continuous form | Whether the liner is intentionally perforated, and how the web will be handled | The web remains connected during the required processing and separates at the intended step |
| An ordinary die-cut outline | A continuous outline, separate from any perforation operation | The label releases correctly and the liner remains fit for dispensing |
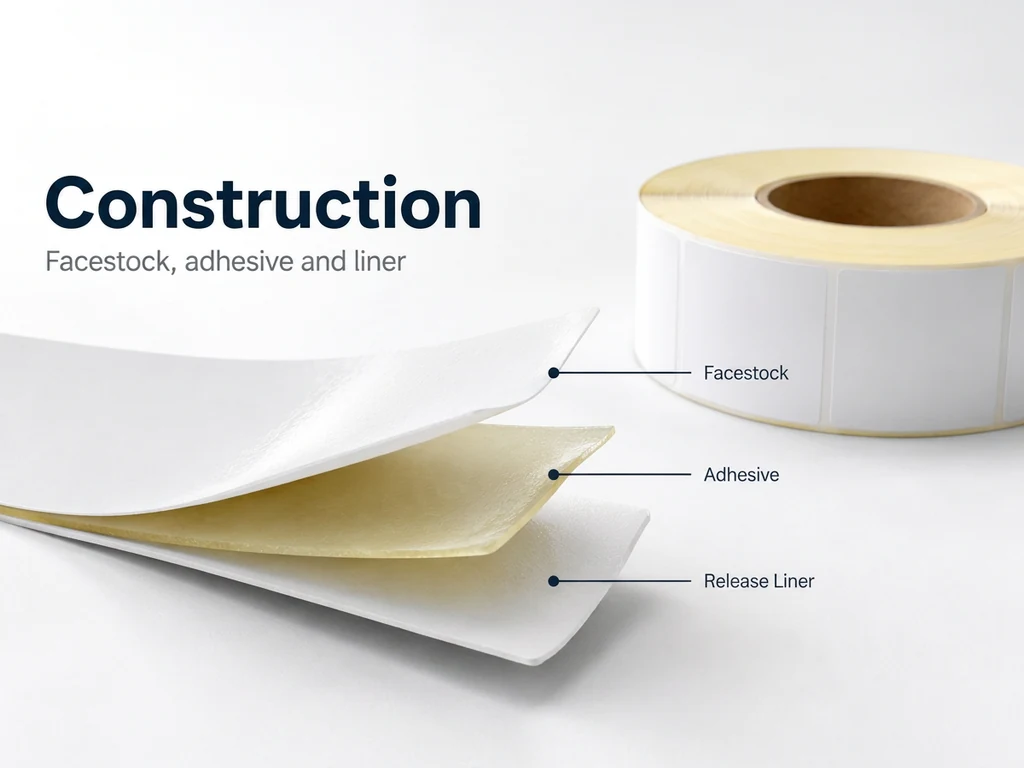
The liner is a working part of the construction, not disposable support that can be weakened without consequence. UPM's liner guidance connects liner selection with converting, stripping and dispensing. Assess the complete construction, including the release system, rather than the facestock alone.
What do cut length, tie length and TPI tell you?
A cut is the separated segment. A tie is the uncut connection between cuts. The pitch is the length of one repeating cut-and-tie unit. TPI describes a count per inch; confirm exactly what the tooling supplier counts and how the drawing states cut and tie dimensions.
Avery Dennison's Perforations Technical Overview discusses cut-to-tie relationships and different perforation applications. Its examples are guidance within their stated context, not a universal recipe for every label laminate.
A geometry example: the same pitch can leave different amounts connected
For a regular repeating pattern: Pitch = cut length + tie length, and Uncut length share = tie length / pitch × 100%.
The three hypothetical patterns below all have a 4 mm pitch. Their repeat count is therefore the same: 25.4 / 4 = 6.35 repeats per inch. Their uncut length shares are not the same.
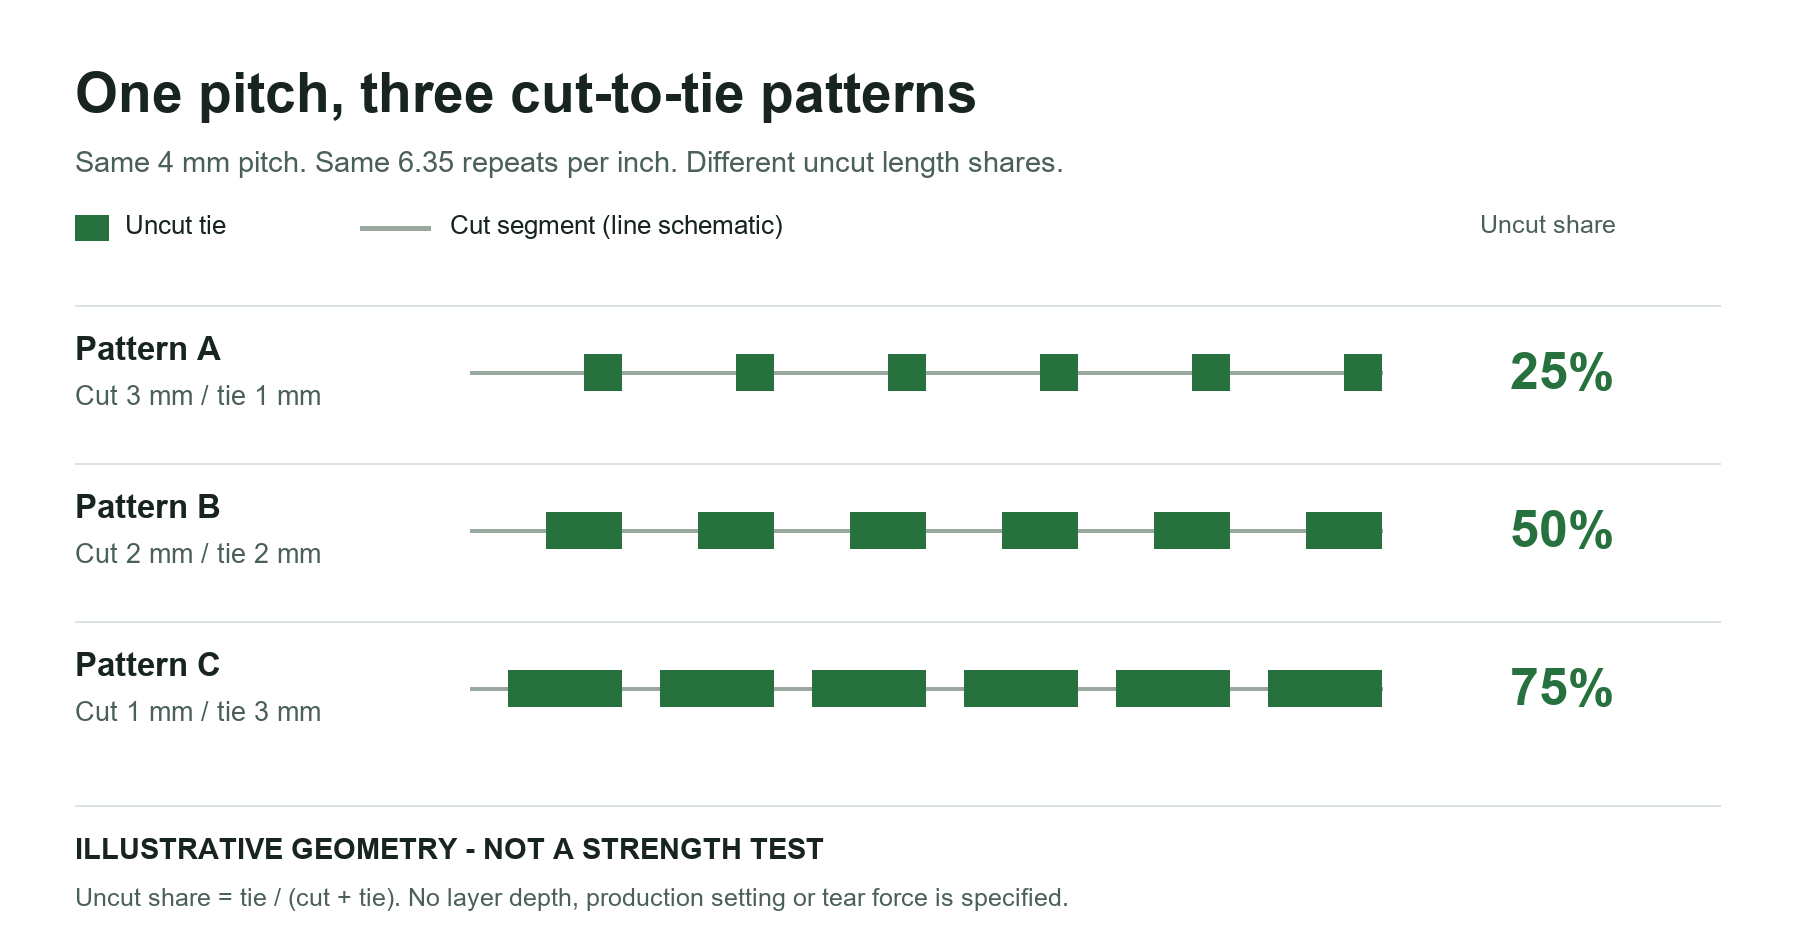
| Pattern | Cut length | Tie length | Pitch | Repeats per inch | Uncut length share |
|---|---|---|---|---|---|
| A | 3 mm | 1 mm | 4 mm | 6.35 | 25% |
| B | 2 mm | 2 mm | 4 mm | 6.35 | 50% |
| C | 1 mm | 3 mm | 4 mm | 6.35 | 75% |
These percentages describe connected length, not retained tensile strength. Pattern C is not established as three times stronger than Pattern A. The example shows why a count per inch cannot replace a complete cut-and-tie specification.
Why does the same pattern behave differently on another material?
Changing the face, coating or liner changes the construction being evaluated. Keep the printed, varnished or laminated condition in the trial record; an unprinted hand sample is not a complete approval of the production label.
Direction also needs a name. Mark machine direction (MD), cross direction (CD), the perforation-line direction and the user's tear direction. They do not all describe the same thing. PPG's finishing guidance for TESLIN substrate gives direction-dependent perforation recommendations for that particular substrate. Those settings should not be transferred to BOPP, PE, PET or glassine.
Specify the actual adhesive and release-liner combination. If the liner changes, evaluate the revised construction rather than assuming that the previous perforation approval transfers with it. The existing glassine versus PET liner comparison is a starting point for that discussion, not a perforation setting sheet.
What should you check when the perforation tears too early or will not open?
Record where and when the separation happens. The checks below are investigation prompts, not confirmed diagnoses or instructions to increase blade pressure.
| Observation | First checks | Evidence to keep |
|---|---|---|
| The web separates before the intended tear-off step | The cut layers, actual tie continuity, local damage and the handling stage | Both broken pieces, lane and repeat location, drawing revision and process conditions |
| The user cannot detach the section cleanly | Measured cut/tie pattern, cut completion, finished surface treatment and how the section is gripped | The retained and detached parts, tear direction and close-ups of the starting point |
| The tear leaves the line and enters the retained label | The line's end positions, local geometry, material direction and damage near the cut | A marked drawing and a photograph before repositioning the specimen |
| A printer jams or the perforated form lifts | The printer's approved media rules, flatness, cut debris and whether the liner is weakened | Printer model, feed orientation and the affected media |
For sheet-fed printing, consult the actual printer's media guide. Lexmark's paper-design guidance identifies tenting and premature separation as feeding risks and discusses limiting cuts through label backing. Its sheet-handling advice is not a rotary-press setup specification.
If the problem is the waste web breaking during stripping, use the separate label matrix-break troubleshooting guide. A waste matrix bridge and a deliberate tear-off tie have different jobs.
What the waste matrix looks like once it is stripped
A die-cut waste matrix skeleton is carried away on a conveyor and discharged into a collection box. The clip was filmed at a packaging exhibition and is shown to illustrate matrix handling only; it is not an AllinLabel production record and no AllinLabel material is identified in it.
How do you plan a useful perforation trial?
Agree on what must stay connected, what must separate and at which stage. Define acceptance with the converter and end user before comparing candidates; there is no pass force or run speed established by this article.
- Lock the baseline. Record the complete laminate, material batch, print/coating condition, drawing revision, tooling and relevant machine settings.
- Inspect the cut. Verify the intended layers and compare the actual cut/tie pattern with the drawing before judging user tear-off.
- Separate the questions. Check survival during the required process separately from deliberate opening. Include the intended handling or exposure where relevant.
- Make one documented comparison. For a geometry comparison, retain the same construction and conditions. For a material comparison, document the geometry and any necessary tooling changes; do not describe unmatched trials as a controlled strength ranking.
- Retain individual observations. Record premature separation, off-line tears, damage to retained print and incomplete opening. Keep unsuccessful specimens as well as acceptable ones.
| Record | Include |
|---|---|
| Specimen identity | Sample ID, batch, construction, drawing and tool revision |
| Geometry and layers | Actual cut length, tie length, line position, direction and intended cut depth |
| Conditions | Conditioning, relevant process settings, exposure and opening method |
| Observations | Stage of separation, tear path, retained-label condition and linked photographs |
| Acceptance | Customer-approved criterion, individual outcome and reason for any exclusion |
For force measurements, define the specimen, fixture, pull direction, speed, units and method before testing. Do not label a hand-tear assessment as a standardized tensile or tear-strength result. Keep the sample count and individual readings with any later summary.
What should you include in a label-material request?
Send the detachable section's purpose and an annotated drawing with the material request. Include the facestock and surface treatment, adhesive, liner, print process, cut layers, MD/CD marking, roll format and the process stage at which the tear should occur.
For a label applied to packaging, also state the container surface, application conditions and expected handling. If you are still choosing a facestock, identify the candidates rather than assuming that every PP synthetic paper construction will open in the same way.
AllinLabel supplies self-adhesive label materials. Request a material sample and the applicable TDS for your converter's trial; available construction and sample format are confirmed per enquiry. The converter and tooling supplier still need to specify and approve the perforation process.
Request material samples for a converting trialTechnical references
- Avery Dennison: Perforations Technical Overview — document 16046, March 2016. Historical technical guidance, not a current AllinLabel specification.
- Laminaform: Perforated label cutting die — Drawing and layer identification.
- UPM Adhesive Materials: Label release liners — Complete-construction and converting context.
- PPG TESLIN: Finishing Techniques — Substrate-specific direction effects; its numerical settings are not adopted here.
- Lexmark: Paper design factors — Sheet-fed media handling; not rotary tooling approval.
Sources checked 24 October 2026. This article combines manufacturer guidance with an illustrative calculation and a proposed trial record. It contains no AllinLabel perforation test results, approved tooling dimensions or product-specific performance guarantee.
Frequently asked questions
- Does a higher TPI always make a stronger perforation?
- No. The count does not establish tie width, cut completion, material direction or which layers carry the load. Compare actual geometry and construction, then evaluate processing and tear-off separately.
- Can I use paper-liner perforation settings on a PET liner?
- Do not assume they transfer. Avery's technical note distinguishes paper-liner perforating from other material cases. Ask the tooling supplier to review the actual film liner, laminate and intended operation; approve the converted sample rather than the material name.
- Are microperforations automatically the best choice?
- No universal choice is established here. Define the required edge, separation and process behavior, then ask the toolmaker which geometry and depth suit that material. A finer-looking line does not by itself prove acceptable feeding or tear-off.
If you are buying material before converting, start from request jumbo roll samples and then narrow the facestock, adhesive and liner with our technical team.
Related materials
Related reading
More guides on quality and related topics
 TroubleshootingWhy Does the Label Matrix Break During Stripping?Diagnose repeating matrix breaks, labels lifting with the waste and liner damage by tracing the failure pattern before changing press settings or materials.10 min read
 TroubleshootingWhy Does Adhesive Ooze From Label Rolls?Sticky roll edges, roller build-up and back-label transfer can come from storage, winding, die-cutting or the complete laminate—not only the adhesive.9 min read
 QualityHow to read a label material datasheet (TDS)Peel figures are meaningless without the panel, the dwell time and the temperature. Here is how to compare two datasheets honestly.6 min read
Request a quote or a free sample
Send us your facestock, adhesive, liner and roll specification. Low MOQ, OEM/ODM, export to 60+ countries.